The 7 Uses of Motion Control
The 7 Uses of Motion Control
(This is the full article previously published in parts)
Did we say 7 uses? – Well that’s not quite true. There are in fact countless. To many to list in a newsletter in detail, but there are generally 7 main reasons for using motion control. These categories are listed below and we will be covering them all in greater detail.
- Repeat Moves – Making elements appear and disappear, crowd replication, changing backgrounds and foregrounds, filming action at different speeds, putting elements together.
- Scaled Moves – Shooting miniatures, rotating camera moves, matching scales.
- Controlled Moves – For controlled filming and lighting on products.
- CGI Export – Combining live-action to CGI.
- CGI Import – Complex moves, unusual shapes, impossible moves, Pre-visualisation.
- Frozen Moment Integration – For mixing live-action and time-slicing or “bullet-time”.
- Specific Music Video Effects> – Audio timecode triggering.
The best known category of use is Repeat Moves and is the basis for all motion control. A good quality motion control system can repeat any camera movement with extreme accuracy, countless times. Once a camera can repeat the movement a whole range of effects can be created. One of the simplest effects is making elements appear or disappear. This is done by filming, for example, an empty room and then filming again with the motion control camera but this time with an actor or some furniture in the room. One can then take the 2 shots and easily mix between the two to make it appear that the furniture or actor is appearing or disappearing. Another possibility is to shoot the room again but this time have the same actor stand in a different position. Now in the finished shot one effectively has duplicated the actor so there are several copies of him on the screen. What about a crowd? Crowd replication is the same idea applied to a battle-field or a busy street scene where one requires hundreds of actors, or maybe identical cars or planes. Well why not take a handful of actors or one plane and simply shoot the same scene again and again with the actors or plane in different positions. Then when compositing it is easy to make it look like a huge number of people or even objects were involved. If one requires the backgound to change instead of the foreground, one could shoot an actor on green-screen and then use the motion control system to shoot a room and a street. Now it becomes very simple in post-production to make it appear that the background is changing for the actor from a room to a street. Motion control is also used when filming animals with other animals or humans that would otherwise be impossible to achieve. For example, imagine creating a shot of a baby playing next to a group of real lions. Or what about a leopard walking next to a zebra. Additionally, where a shot can only be done with an animal trainer controlling the animal, it is possible to shoot a “clean pass” of the scene. Once one has a clean pass, it is very simple and an almost automated process to remove the trainer from the scene to only leave the animal. Because Mark Roberts Motion Control systems are designed to be ultra accurate, one can shoot at different film speeds and combine the shots seamlessly. For example, one could have an actor walking and talking at live-action while everyone around him is moving in slow-motion or high-speed. The repeatability of the motion control camera means you can shoot at 4FPS (frames per second) and then again at 120FPS and when combining the two, it will be impossible to see a join. Another area that is covered by the Repeat Moves category is animation and mixing animation with live-action.
Scaled Moves
Scaled moves is more than just taking a move and changing its size, and many different effects can be achieved using the scaling feature of Flair, the motion control software developed by Mark Roberts Motion Control. The simplest concept is doing just that, changing the scale, for example it may be that a large full size set would be to costly to build, or take too long, or it maybe that the camera movement required would be too large to achieve with a crane, so a scale model is built and shot using a motion control system. The software will then automatically scale the movement up or down to then shoot again but this time with a live actor or another differently scaled model. Because the 2 movements are shot from exactly the same perspective, just scaled, the 2 camera passes will match so that it appears that there has been no change. It can be made to look like an actor is standing in a room that is much to large for him, or on a castle even though the castle only exists as a small scale model. These techniques are often used in feature films, in everything from Entrapment, to Harry Potter, to The Borrowers. In fact, in the latter, a large encoded crane was used to shoot the actors against blue-screen and then the recorded move data transferred to a motion control rig, to scale and shoot again but this time with actors in a real set. The two takes were then seamlessly composited to look like there was a huge difference in physical size between the actors. Scale models were also used on Moulin Rouge, which has currently been nominated for 8 Academy Awards, including Best Cinematography.
Another form of “scaling” is often used that does not actually involve a difference in scale, only in position or orientation. It is possible to tell the software to rotate the move in any direction. For example, if one has a box and one wants to make it appear that people are walking on many of its different sides, then one shoots a scene with an actor walking on top of the box. Then one shoots again but telling the motion control rig to rotate the move by 90 degrees. Now those 2 takes can be seamlessly composited to make it appear that one actor (or even the same actor) was walking on 2 different sides of the box, completely defying gravity. This trick could be done with staircases, or with rooms, of having people walking on the walls and ceiling (as can be seen on the Showreel – Motion Control Explained).
Controlled Moves
Controlled Moves, while being one of the simplest uses of motion control is often most forgotten about and under-estimated. Motion Control is most commonly used not because of some amazing special effect, but simply because the Director and DoP want their shot to look exactly right. They want the lighting exactly as required, no flat spots, flares or bad reflections, and the talent doing exactly the right action when required, and motion control saves them a lot of time. Take a product shot for a commercial, such as a car or a drink. Any DoP will tell you that trying to handle the lighting on a car can be very time consuming, with all its reflective and smooth, flat parts. The light may be right on one part of a car and wrong on another. Now even once you have adjusted the lighting, if the grips pushing the camera do not produce the exact same move during every take, one can get new lens flares or reflections show up. Additionally, even if they are perfect, if the actor or the focus puller makes a mistake, another take has to be done, hoping the camera move will again be the same. With motion control this whole process is dramatically speeded up, as one simply programs in the desired move which can then be played back over and over it different speeds, checking the lighting at every frame. Once the lighting is right, the camera will accurately be controlled to repeat the movement including focus and zoom changes and it can be shot using just one take. Additionally, in most western countries, the cost of renting a crane with grips and focus puller is no different than a similar sized motion control rig and operator, yet the motion control system’s capabilities are much higher, saving time and costs.
Another use of controlled moves, is when using complex lenses or even macro lenses. For some shots, one requires a snorkel lens (a lens with a right angle turn in it) or a long boroscope lens, to get into very tight spots or in between scale models (e.g. models of buildings). Controlling a camera with such lens by hand is very complex, but by using a motion control rig, one can program in the move very quickly and then get the shot. The move is easily adjusted and edited to get the exact move required. Similarly, if shooting with a macro lens, when shooting very close to an object, all camera movements become greatly magnified. It becomes quite hard to move a camera by hand without the shot looking unsteady, wobbly or shakey. But a motion control rig controls the camera movement very accurately down to fractions of millimetres, so extreme close-ups are easy to program and shoot, and of course the lighting can also be adjusted to suit the shot.
Frame-by-frame animation although discussed in part 1 – Repeat Moves – is also closely related to the controlled moves use of motion control. The whole camera move is programmed into the motion control rig, and all the focus and lighting adjusted as one continuous move before shooting the scene using stop-frame animation.
CGI Export
CGI Export is the term given to any move data that is transferred from a motion control camera to 3D CGI (Computer Generated Images) software. Because the Flair motion control software knows the exact 3D position of the camera at any point, both in real-time and with a sub-millimetre accuracy, it is very simple to export this data (sometimes referred to as XYZ data) to CGI to add computer graphics background or foreground elements. The data is read by a huge variety of software packages, including Softimage, XSi, Maya, Flame, Lightwave, Inferno etc. and because the data is very accurate, the Flair software taking account of different lenses and the effects of focussing, 3D elements are much more easily and accurately added than any other method.
Mark Roberts Motion Control is the only company in the world to design and create all the parts of a motion control system, including the mechanics and the software. This means that features have been built into the Flair software that are not possible on any other system. It has such an accurate model of the mechanics that it also gets used for real-time applications such as Virtual Studios or on-the-set graphics previews, where the CGI elements are added in real-time to the live video footage, according to the real-time XYZ data from Flair.
One could film an actor in a live set and use the CGI export data to add foreground elements for the actor to interact with, or one could additional background elements. Adding additional background elements is sometimes referred to as digital matte painting, where a graphics artist creates a model of scenes in the distance that don’t require as much detail as the scenes shot with a camera in the foreground. This is often used for feature films, such as Gladiator, A Knight’s Tale, or Star Wars, where a live scene is filmed, sometimes using a scale model, and then the background is changed to have some amazing city, skyline, or mountain in the background, and because the camera XYZ’s are known precisely, once the digital matte painting is created, adding it with the right scale and perspective is easy.
When exporting CGI data, motion control moves do not have to be pre-programmed. One may need to accurately follow an actor or an animal, or the director may want a very erratic, “human” or steady-cam looking move, and these are all easily done using remote handwheels or the popular Grip-Sticks which allow a Director of Photography to simply push the motion control camera by hand, as if it were hand-held or on a crane, all the while recording the movement and the camera position for exporting to CGI.
CGI Import
With the rapidly increased use of computer graphics for planning and storyboarding of productions, and on the actual set during the production, the use of interfacing motion control with CGI has grown dramatically.
CGI Import is the term given to any move data that is transferred from 3D CGI (Computer Generated Images) software to a motion control camera. Because the Flair motion control software has a very accurate Inverse-Kinematics model of the rig moving the camera, including the exact parameters of the optical lens, it is very simple for it to move the camera to any 3D position in space (referred to asXYZ position).
Effectively, one can plan and storyboard a whole shot in software packages such as Softimage(tm) or Maya(tm), and then arrive on set and have the camera achieve the exact same shot. Because moves have been created in a graphics environment, complex effects can be achieved. Additionally, because everything about the shot is known beforehand, less waste is achieved on set (by not building oversize sets or backgrounds, only getting the exact lights and grip equipment required, having less planning and unknowns occurring on-set) thereby reducing actual production costs.
This whole action of pre-planning moves is referred to as Pre-visualisation, and is becoming common place on large feature film productions as well as commercials and music promos.
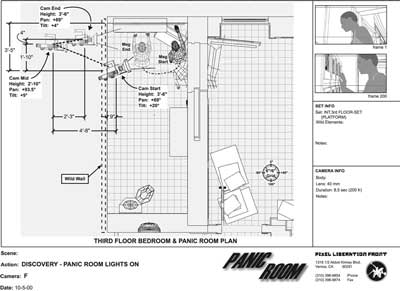
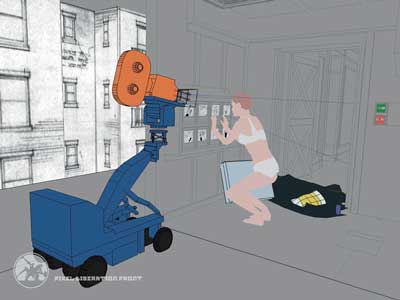 Pictures courtesy of Pixel Liberation Front
The Panic Room is one of many recent productions, including Harry Potter, K19, Dinotopia, Black Hawk Down, and Spiderman, that makes heavy use of pre-visualisation. Using Softimage|XSI, Pixel Liberation Front managed to create an animated CG version of the 105-page script of Panic Room for David Fincher’s latest Columbia Tri-Star movie. It was used as the primary animation tool to pre-visualize the entire set, camera positionings and movements, as well as character moves, in order to facilitate the actual shoot and production of the film. It was a creative tool for Fincher and it provided an enormous amount of detailed technical, and pre-production information for every aspect of making the movie – from art direction to music scoring to set construction.
Ron Frankel, PLF’s previsualization supervisor explains:
“David Fincher’s goal was to produce a coherent 3-D animated and edited cut of the film before the shooting even began. The scenes we created with XSI included the set, characters, key props and set dressing. We were able to animate the scenes with XSI to indicate both character blocking and camera movement, giving a sense of how individual shots would look before they were filmed and how they would be edited together into a sequence. The 3-D scenes were highly interactive, allowing film director David Fincher to refine actor blocking, timing, camera position and other factors, and immediately see the results. The animation was also used to derive a wealth of information relative to set construction, camera equipment needs, set dressing and so forth, making it an invaluable asset to the production crew. This saved time and money that would otherwise have been spent on set configuration, camera placement and rehearsals. ”
Frozen moment
Motion control can be used to match camera array shots. Camera Array shots are also known as frozen moment or time-slicing orbullet-time (made famous in The Matrix). Because the camera array represents a moving camera path the same path can be defined in a motion control move. This allows all of the other effects that are possible with motion control to be combined with frozen moments. For example, a live action pass filmed with motion control allows for the insertion of a moving person into a frozen scene.
Motion control can also be used to get into and out of frozen moment shots seamlessly. A camera move can begin with a motion control move and switch at some point to the camera array. The motion control system moves the motion picture camera¹s position from a start position to the first position of the camera array, at which point the camera array is triggered. In post production a straight cut joins the two shots. Dayton Taylor¹s company, Digital Air (http://www.virtualcamera.com), has produced a special Arri mount lens with a mirror in front of it that allows a motion picture camera¹s point of view to connect with his Timetrack camera without the two cameras crashing into each other at the transition point.
Because frozen moment shots often use interpolation to create in-between frames, the number of cameras in the array does not necessarily equal the number of frames in the final shot. Interpolation is used to overcome camera spacing limitations. Frames can be interpolated that appear to have been recorded from camera positions between the actual cameras. When integrating camera array shots with motion control, scenes can be designed that take this into account. For example, even a small (ten camera) array can produce a significant spatial perspective shift. If the ten camera array shot is interpolated to sixty frames then the corresponding match move motion control shot should record all sixty frames, not just the ten frames that match the camera array¹s individual camera positions. This is particularly useful because it allows interpolation to be used only on the elements which require it and motion control can be used to produce the footage of the other elements in the shot such as background and moving elements.
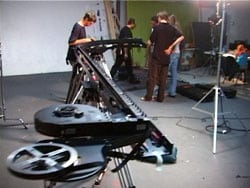
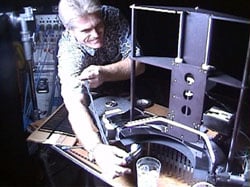
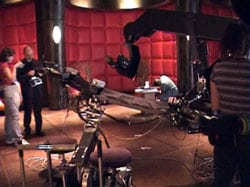
The photos below show Digital Air’s camera array being used with the Milo motion control rig, for a Schweppes commercial. Director Jon Hollis from Smoke and Mirrors, London, used Timetrack cameras for product shots and a Milo for matched moves of the background, which included the commercial’s main character, a talking leopard:
Specific Music Video Effects – Audio Timecode Triggering
Motion Control in shooting music videos (promos) is not as such a separate use of motion control. Unlike the earlier mentioned uses of motion control, it is not used to achieve something that was previously impossible or difficult, rather it uses the previous uses of motion control together with timecode to achieve the effects specifically in synchronization to sound. It is noted not because it allows motion control to achieve a new type of effect, but simply because triggering to audio or video timecode allows the normal uses of motion control to be incorporated into music promo productions. By feeding the audio timecode into the motion control software to trigger the start (or any part) of the moco rig’s movement, it becomes very simple to create and join film footage to audio
sound-track in a repeatable and synchronized manner. Then all the features of the Flair software come into play, such as scaling, actor replication, repeat moves, varying shooting speeds etc.
One clever use of Motion Control with timecode triggering is a music video by Kylie Minogue “Come Into My World” which was shot by Michael Gondry using a Milo which was placed in the centre of a road junction and made to rotate around and around. It was made to repeat the same move again 3 times all synchronized to music so that by the end of compositing there are 4 Kylie Minogue’s walking and singing together through the streets.

Four Kylie Minogue’s interacting using Timecode Synchronisation.
A similar in-studio effect is achieved in the recent award winning Outkast Hey-Ya. Another example is where very fast camera moves are required and the speed of the timecode is actually slowed down during shooting. When the footage is then played back the actors appear to be singing in realtime but the camera motions around them are extremely fast.
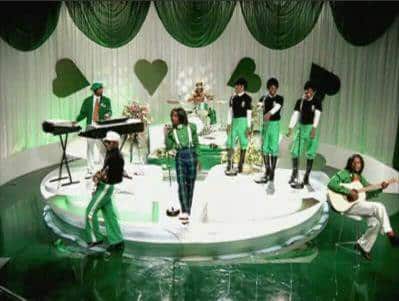
Outkast’s Love Below Promo
